A quick tutorial about how to get the map images
A few people have requested that I explain how I get the map, track, and profile images I use here in the blog, so here goes with a little tutorial.
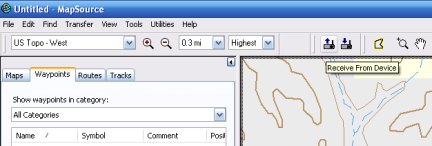
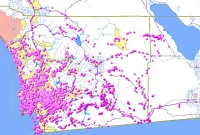
The first thing I do as soon as I get home from a "caching adventure," is hook up my GPS unit, a Vista HCx, to my computer. I open Mapsource Topo and use the "Receive from Device" icon on the toolbar to get the Tracks and Waypoints in the Mapsource program.
I save that file with the date and the location in a "Tracks" folder on my computer. My hike to MTRP was "021708_MTRP"
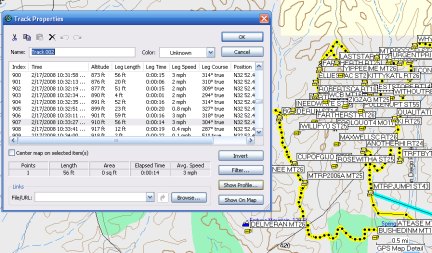
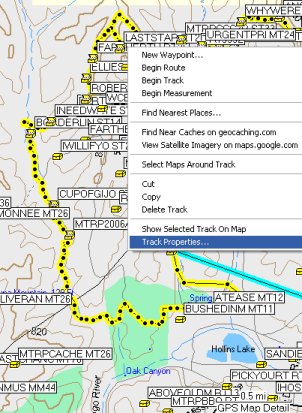
Then, I zoom in so the Tracks fit on one side. I right-click on the Track, highlight it, and choose "Properties."
From the Properties page, I click on "Show Profile."
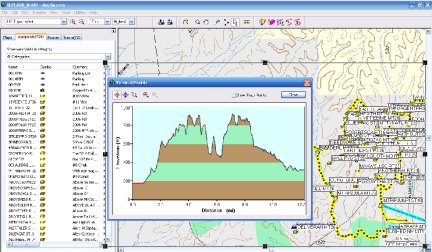
I move that box with the Profile image on it to a place where it will show next to the Track. Then, I use the "Print Screen" button on the keyboard.
This gives me an image of the entire screen and saves it on the "clipboard".
I have an older version of Corel PhotoPaint on my computer and I open that program. It has an option for File/New from Clipboard. Other graphics programs like "Irfanview" or "PhotoShop" or "Gimp" or "Paint" might work, but I'm not familiar with them.
The image from the clipboard now fills the PhotoPaint window. I use the "Crop" tool to get only the image I want, the Profile graphic and the Track. This next image shows the image, and the crop tool mark followed by the image after it is cropped.

After cropping the image, I "Resize" it to approximately 600 pixels wide and save it as "_Profile.jpg" in the same folder as the rest of the photos I took that day. I put the underscore in front so it will be at the top of the list of photos for easy access.
I hope this helps you guys who requested a little tutorial . . . ;-)
The first thing I do as soon as I get home from a "caching adventure," is hook up my GPS unit, a Vista HCx, to my computer. I open Mapsource Topo and use the "Receive from Device" icon on the toolbar to get the Tracks and Waypoints in the Mapsource program.
I save that file with the date and the location in a "Tracks" folder on my computer. My hike to MTRP was "021708_MTRP"
Then, I zoom in so the Tracks fit on one side. I right-click on the Track, highlight it, and choose "Properties."
From the Properties page, I click on "Show Profile."
I move that box with the Profile image on it to a place where it will show next to the Track. Then, I use the "Print Screen" button on the keyboard.
This gives me an image of the entire screen and saves it on the "clipboard".
I have an older version of Corel PhotoPaint on my computer and I open that program. It has an option for File/New from Clipboard. Other graphics programs like "Irfanview" or "PhotoShop" or "Gimp" or "Paint" might work, but I'm not familiar with them.
The image from the clipboard now fills the PhotoPaint window. I use the "Crop" tool to get only the image I want, the Profile graphic and the Track. This next image shows the image, and the crop tool mark followed by the image after it is cropped.
After cropping the image, I "Resize" it to approximately 600 pixels wide and save it as "_Profile.jpg" in the same folder as the rest of the photos I took that day. I put the underscore in front so it will be at the top of the list of photos for easy access.
I hope this helps you guys who requested a little tutorial . . . ;-)
posted by Miragee at
9:50:00 AM
![]()
![]()

 10-Day Forecast


2 Comments:
Awesome.
Thanks.
By rakethetable, at 3:25 PM
I'm so excited to start seeing that on other's blogs. Good luck getting the extreme elevation changes on your tracks everyone. It looks like Miragee does some serious hiking! Thanks for the tutorial.
Geocaching With Team Hick@Heart
By Josh, at 6:52 PM
Post a Comment
<< Home